Pout Perfection: The Essential Steps to Beautiful Lipstick Application
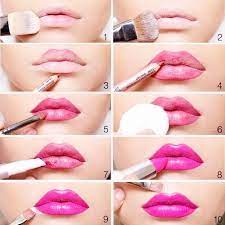
Lipstick application may seem like a simple task, but achieving a flawless finish involves more than just swiping color onto your lips. The right order of application can make a significant difference in the longevity and appearance of your lipstick. Here’s a step-by-step guide to help you master the art of applying lipstick for a polished and long-lasting look.

Step 1: Prep Your Lips
Before applying any lip color, it’s essential to start with a smooth canvas. Begin by exfoliating your lips to remove any dead skin cells. You can use a lip scrub or create your own by mixing sugar with a bit of olive oil. Gently massage the mixture onto your lips, then rinse and pat dry. This step ensures that your lipstick adheres evenly and lasts longer.
Step 2: Moisturize
Hydrated lips are key to preventing your lipstick from settling into fine lines. Apply a lip balm or moisturizer to keep your lips soft and supple. Allow some time for the product to absorb before moving on to the next step.
Step 3: Use a Lip Liner
Lip liner is often underestimated but plays a crucial role in defining your lip shape and preventing your lipstick from feathering. Choose a liner that closely matches your lipstick shade and carefully outline the natural contours of your lips. You can also fill in your lips with the liner to create a base for the lipstick.
Step 4: Apply the Lipstick
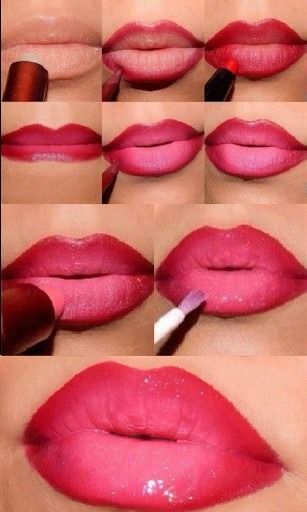
Now it’s time for the star of the show – your lipstick. Start at the center of your upper lip and carefully follow your natural lip line towards the corners. Repeat the process on your lower lip. For a more precise application, you can use a lip brush. Build the color gradually until you achieve the desired intensity.
Step 5: Blot
To enhance the longevity of your lipstick, blot your lips with a tissue. Fold the tissue in half and gently press it between your lips. This removes excess product, preventing it from transferring onto teeth or smudging.
Step 6: Set with Powder
For an extra layer of staying power, lightly dust your lips with translucent powder. Use a small brush or your fingertip to apply a thin layer of powder over the tissue. This trick helps to set the lipstick and reduces the chances of it fading throughout the day.
Step 7: Clean Up Edges
To perfect your lipstick application, clean up any uneven edges with a concealer or foundation on a small, angled brush. This step defines the lip shape and ensures a polished finish.
Step 8: Consider a Lip Sealant
For special occasions or when you need your lipstick to last for an extended period, consider using a lip sealant. These products create a protective layer over your lipstick, preventing smudging or fading.

In conclusion, the order in which you apply lipstick can significantly impact the final result. By following these steps – prepping, moisturizing, using lip liner, applying lipstick, blotting, setting with powder, cleaning up edges, and optionally using a lip sealant – you can achieve a professional-looking lip color that stays put throughout the day. Experiment with different shades and techniques to find the perfect lipstick routine that works for you.
Disclaimer: The following statements represent my personal views, and it is possible that you may hold different opinions.
Recommend0 recommendationsPublished in Makeup


